- Open a Private Window in your internet browser (❗)
- Go to Lexis Create+ Portal > Integrations
- and login with your Lexis credentials
- Go to Integrations and select Connect for Microsoft Sharepoint (Service Principal)

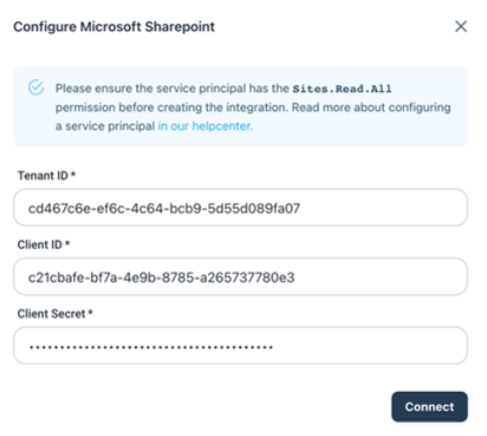
- You will be directed to the Sharepoint configure dialogue of Microsoft.
You'll need to add a Tenant ID, Client ID and Client Secret. When this information is added, click "Connect".
- Tenant ID and Client ID: you can find those in Azure (see the overview tab, on the left):

- Client Secret is sensitive information and can be found somewhere else:
- Go to "Certificates & Secrets" , then "client secrets"

-
Click "new client secret" and select "Expires: 24 months"

-
Client Secret is the value shown after creating the secret. This value will disappear after you refresh the page (as it’s sensitive information). So immediately copy and paste this value to your Lexis® Create DMS dashboard.
- Go to "Certificates & Secrets" , then "client secrets"
-
You will be redirected back to Lexis® Create DMS. Lexis® Create DMS will start syncing and you will see in the dashboard when the sync is finished. There is no need to keep Lexis® Create DMS or your computer open. At this moment, we will keep an eye on the integration, ensure the right integration settings are applied and let you know when the sync has finished.
Go back to the integration guide to follow the next steps of the integration.
A Lexis® Create DMS administrator on the customer side needs to connect the Sharepoint environment to Lexis® Create DMS. If you do not have access to the Lexis® Create DMS dashboard yet, reach out to your customer success manager.